Sunday, 29 April 2012

31 Day Nail Art Challenge - Day 24


So it's been a while since the last post, but university work should occasionally take priority over nails!

Here's Day 24 - Inspired by a Book!

I don't know why but for this challenge I chose Lord of the Flies. Not quite as feel-good and cheerful as Disney, but I thought it would be a great subject! For those of you who have read Lord of the Flies these nails hopefully explain themselves! Otherwise we hope you enjoy!


Thumb: The book's front cover
This nail is easy as pie really! Just have to have a fairly steady hand for the lettering!
1) Paint on a bright orange base coat
2) Using a yellow varnish, paint on the title - be careful to space it out properly (as I had a bit of trouble as you can see!)
3) Using a blue, paint on the snake to the left of the nail

Index Finger: Piggy!
If you have read the book, you'll know Piggy (though not a real pig) is a pretty major (and annoying) character!
1) Using a pink nail varnish, paint the bottom half of your nail, curving it slightly
2) Add the pink ears! (Much easier if you do this separately to the head to prevent any varnish spreading)
3) Using a white, paint on two circles for eyes
4) Use black outline for the rest!


Middle Finger: A desert island
The setting of the book, where it all hits the fan...
1) Using a pale (sky) blue, your whole nail
2) Use a darker blue for the sea over half of your nail
3) Using a yellow, paint on the island shape
4) Paint a tree-trunk for your palm tree
5) Paint on the leaves with a dark green!
And there you have your desert island paradise!


Ring Finger: Fire
If I remember back to the days of GCSE English, fire symbolism was VERY important in the book, so I decided to paint on the signal fire the boys make!
1) Paint on a sky blue base
2) Using a red, paint on various flame shapes
3) Once dry, use an orange over the top
4) Throw on a bit of yellow too!
5) Add the smoke!


Pinky: The conch
This is SUPPOSED to be a conch (one of those large shells you can hear the ocean in), but looks more like a peachy, pinky brown blob... I tried!
1) Paint a base coat of any colour really - white just seemed best
2) Using a light brown, paint a triangular blob on with a few sticky-outy bits
3) Use a dark brown outline for that 3D effect
3) Use a pink to draw a line indicating the inside of the shell!


What do you think? (Maybe give the last nail a miss!)


HanDee 


xx


Sunday, 22 April 2012

31 Day Nail Art Challenge - Day 23


Feast your eyes on our Day 23 - Inspired by a Film!


Here at HanDee we absolutely love a good Disney film. Heart-warming stories, adorable characters, good morals - what's not to like?! Not to mention the incredible soundtracks! 


But anyway... the film we have chosen for this challenge is one of the more recent (yet still amazing) Disney films, Tangled!


Now for the tricky part...

Thumb: Disney Logo!
1) Paint on your background
2) Add a few large black circles for the Mickey Mouse heads
3) Add two smaller circles for the ears!

Index Finger: The Magic Flower
Now, for those who have seen the film, this needs no explaining. For everyone else: firstly, watch the film - very enjoyable! Secondly, this flower plays a pivotal role, healing with it's magic and the like...
1) Paint on a purple background
2) Using a bright yellow, paint a circle in the centre 
3) Then add your sun beams!


Middle Finger: The Lantern Scene
1) Paint your nail a lilac colour
2) Add a dark purple for the lake on the bottom half of your nail
3) Add a slightly faint sponging of a darker purple over the sky
4) Add the silhouettes of the castle and the boat with the figures on in black
5) Paint on the lanterns with a gold varnish! Magical!


I based this nail (my personal favourite) on the, quite frankly, awe-inspiring make-up of Katie Alves:
Check out her other Disney themed eye-makeup here!
http://katiealves.deviantart.com/


Ring Finger: Pascal!
Now this didn't exactly go to plan... He looks a little more sinister and alien than the cute little chameleon from the film but I gave it a go!
1) Paint on your background
2) Using a light, but fairly bright green paint on the shape of his body and head - VERY tricky for me! Especially on the right hand!
3) Once dry, using a darker green add some outlines and detail
4) For the eyes: paint on circles of white, then brown, then black for the pupils
5) Add a little mouth and nose detail and there you have it! A small green critter that ever so slightly resembles Pascal!


Pinky: Rapunzel's blonde hair
After the disaster of the previous nail this one is a nice and easy end to the theme!
1) Paint on a gold base
2) Add however many highlights you fancy in slightly different shades of yellow and gold


Hope you like!


HanDee


xx

Thursday, 19 April 2012

31 Day Nail Art Challenge - Day 22


Here's our Day 22 - Inspired by a Song!

Now, being a HUGE Lady Gaga and Beyoncé fan, when I first heard they were collaborating on a song I was one happy chappy! So to commemorate this AMAZING duet, as you may have guessed, the song we were inspired by was Telephone!


If for some crazy reason you haven't heard the song, check it out here:


Now, if you haven't seen the video, these nails don't really make a lick of sense, but we hope you enjoy them anyway!


How-To!


Thumb: one of Beyoncé's outfits
1) Paint on a royal blue base coat
2) Using a gold varnish, paint a thin strip on the tip of the nail
3) Then add some gold tassels running down
4) Finish off with some different colour jewel shapes!


Index Finger: one of Lady Gaga's outfits
1) Paint on a vertical yellow stripe
2) Once this has dried, paint on a few horizontal stripes - no need to be parallel!
3) Add a few black specks (which are supposed to be letters)


Middle Finger: Hello, hello baby, you called?
For this nail, I decided to go with the title of the song!
1) Paint on any colour background you fancy
2) Using a contrasting colour, paint on the phone shape, and the spirally cord coming off of it
3) Use a black varnish to do an outline


Ring Finger: The Big House 
Here we painted the setting of the video - prison. Nice and easy!
1) Paint on a white background
2) Paint on your prison bars!


And finally, the Pinky: another Gaga outfit
1) Paint half of your nail red, but with a slight diagonal slant
2) Paint on an over-lapping layer of blue
3) Then add the stars (or in this case dots) and stripes!


What do you think?


HanDee


xx


Sunday, 15 April 2012

More 31 Day Nail Art Challenge!


Here's Day 21 - Inspired by a Food!


This day is a new one that we've added to our challenge as we didn't have any stamping tools for the original Day 15 - Delicate Print...


Hope you like it!
As great lovers of food, we couldn't pick just one thing so decided to paint a variety of sweet treats! Omnomnom!

Now for the How-To part:


Thumb: Cupcakes
1) Start with a base coat, pastels seemed to suit this pattern best
2) Paint on the square-ish cupcake cases with any colour you fancy!
3) Add the icing to your cakes - which again can really be any colour!
4) Using a few colours you haven't already, add some sprinkles and then...
5) ...Put the cherry on top!

Index Finger: Iced Gems (a personal childhood favourite!)
1) Paint on your base coat
2) Using a light brown paint circular bases for the Gems
3) Paint stretched drops on top of the biscuit base for the Iced part
4) Add a white highlight to the left of your Gems for the extra touch! 

 Middle Finger: Gummy Bears
 Now for this finger we used an incredibly helpful tutorial from IHaveACupcake!
Check it out!


Ring Finger: Lollipop, Lollipop Oh Lolli-Lolli-Lolli Lollipop!
 1) Base coat!
2) Paint on a few lollipop sticks
3) Add your lollipop heads! Simple as that!

Pinky: Ice-cream
1) Begin with, yep you guessed it, your base coat!
2) Paint on your ice-cream cone
3) Add a few scoops of ice-cream on top! We went for the classic combo of chocolate, vanilla and strawberry  - but feel free to be more un-traditional!

And there you have it! Yum yum for my tum! Only con, it did make me want to eat all these treats every time I looked at my hands!

What do you guys reckon? 

HanDee

xx


Wednesday, 11 April 2012

31 Day Nail Art Challenge continued...


As this last batch of days is a little more complicated and needs a bit more explanation, we'll be posting one by one! 

So here's Day 20 - Inspired by a Colour


As it was super sunny, we were definitely inspired by the colour yellow for Day 20! And what better way to get in the summer spirit than with Sunflowers! Laaavely!


All you need:
2 different shades of yellow nail varnish
Any colour for your base coat (we chose a sky blue for ours)
1 brown nail varnish
1 gold nail varnish
A clear cover coat


Six easy steps to achieve this design!
1) Paint your base coat
2) Using the brown nail varnish, paint semi-circles on the bottom left-hand corners of each nail
3) While the brown is still a little wet, using your gold, paint an outline around the brown, blending the two colours slightly
4) With one of your yellows, paint fairly thin petals extending towards the edge of each nail
5) Once this layer of petals is dry, paint another layer over the top with your other shade of yellow
6) Finally, finish your design off with a clear cover coat to protect it!


And voila! A lovely summery nail art design to brighten anyone's day!


HanDee


xx


Thursday, 29 March 2012

31 Day Nail Art Challenge continued...


OK guys, here's the next batch of the 31 Day Nail Art Challenge! Getting slightly trickier now, but you mustn't give up, the results (and compliments!) are well worth it!

Day 9 - Metallic
Though fairly difficult to tell, I aimed to do a sort of tartan pattern here using a metallic blue, pink and silver. It sort of turned into a mass of blobs, but still looks quite striking we think!
What you'll need: a metallic base coat, and then two metallic nail art pens. After the base coat has dried, paint on crosses with one of your nail art pens. Then (and this is where we went wrong!) once it is BONE DRY, take the other pen and draw crosses over the top of these, making these crosses slightly thinner. Tartan-tastic!

Day 10 - Gradient
Ridiculously easy to do and just gives your nails that extra something! Here we used a dark purple, purple glitter and then silver glitter nail varnishes.
For this effect you will need a sponge and then lightly dab each colour on, waiting for the nail varnish to dry in between.


Day 11 - Polka Dot
This design is so much fun and really bright, perfect for the lovely weather Spring brings!
After painting your base coat, grab a few nail art pens in different colours and go wild! Here especially like the over-lapping of the dots, giving it that little somethin' somethin'.

Day 12 - Stripes
We went for a simplified manicure here, which has quite a classy look. But give it a go with clashing colours or more stripes! Go mad!

Day 13 - Animal Print
We LOVE LOVE LOVE a bit of leopard print, so it was obvious what animal we wanted on our nails! But just to spice things up, we went for a crazy colour combo.
To achieve leopard print: paint on your base coat. Then after it's dry, using one of your chosen colours paint small circular blobs on your nails. Then finally, using your other colour (we recommend a darker one to the blobs) draw semi-circles around the dots and add a few small dots next to these!

Day 14 - Floral Print
There's nothing better in life than stopping to smell the roses, and with this design you can have these beautiful flowers at hand any time (get it?) Perfect for the sunny seasons!
You will need: a background colour of your choice, a dark green nail pen, a white nail art pen and then two shades of the same colour for your roses.

1) Begin (after your base coat has been applied) by painting relatively large circular blobs on your nails with the darker shade of the colour you have chosen for your rose

2) Now using the lighter rose colour, draw some small semi-circles (3 worked for us) onto your rose
3) Using the white pen, do the same and paint semi-circles on the outer edges with a cheeky one in the centre to shape the petals
4) With your dark green, add the leaves to the roses ... and there you have it!

Day 15 - Tribal Print
This design was so fun to paint on and looks really original and exciting! 
It's pretty much up to you how you want to paint on your tribal print, we chose three very different colours: purple, red and cream as the base. All you need to do is paint on a few stripes (vertical or horizontal!) anywhere you fancy on your nails, then use a black nail art pen to add the tribal detail. Pretty nifty eh?

Day 16 - Glitter
As you may have guessed, it was St. Patrick's Day when this day came around, so we wanted to incorporate the Emerald Isle into the design!
What you'll need: three different shades of green nail varnish and a glitter polish.
How to do it: start by painting a stripe of green over the top of your nail; once dry, paint small light green crosses on your nail; once these are completely dry, use your darker green polish to draw an outline of the clovers and the stalks!

Day 17 - Half Moons
This design has always seemed quite plain and, well boring, but after trying it out we loved it! Very simple (and easy!) but very effective for a more interesting mani!
All you need is a couple of contrasting colours, and you're good to go! Start by applying the base coat, then once dry use your second colour to paint a semi-circle at the base of your nail and it's that simple! We added an extra line to break the colours up even more.

Day 18 - Galaxy Nails
Now this one is a bit tricky... But is well worth all the effort! An AMAZING tutorial for this can be found by cutepolish at:

Cutepolish Galaxy Nails Tutorial

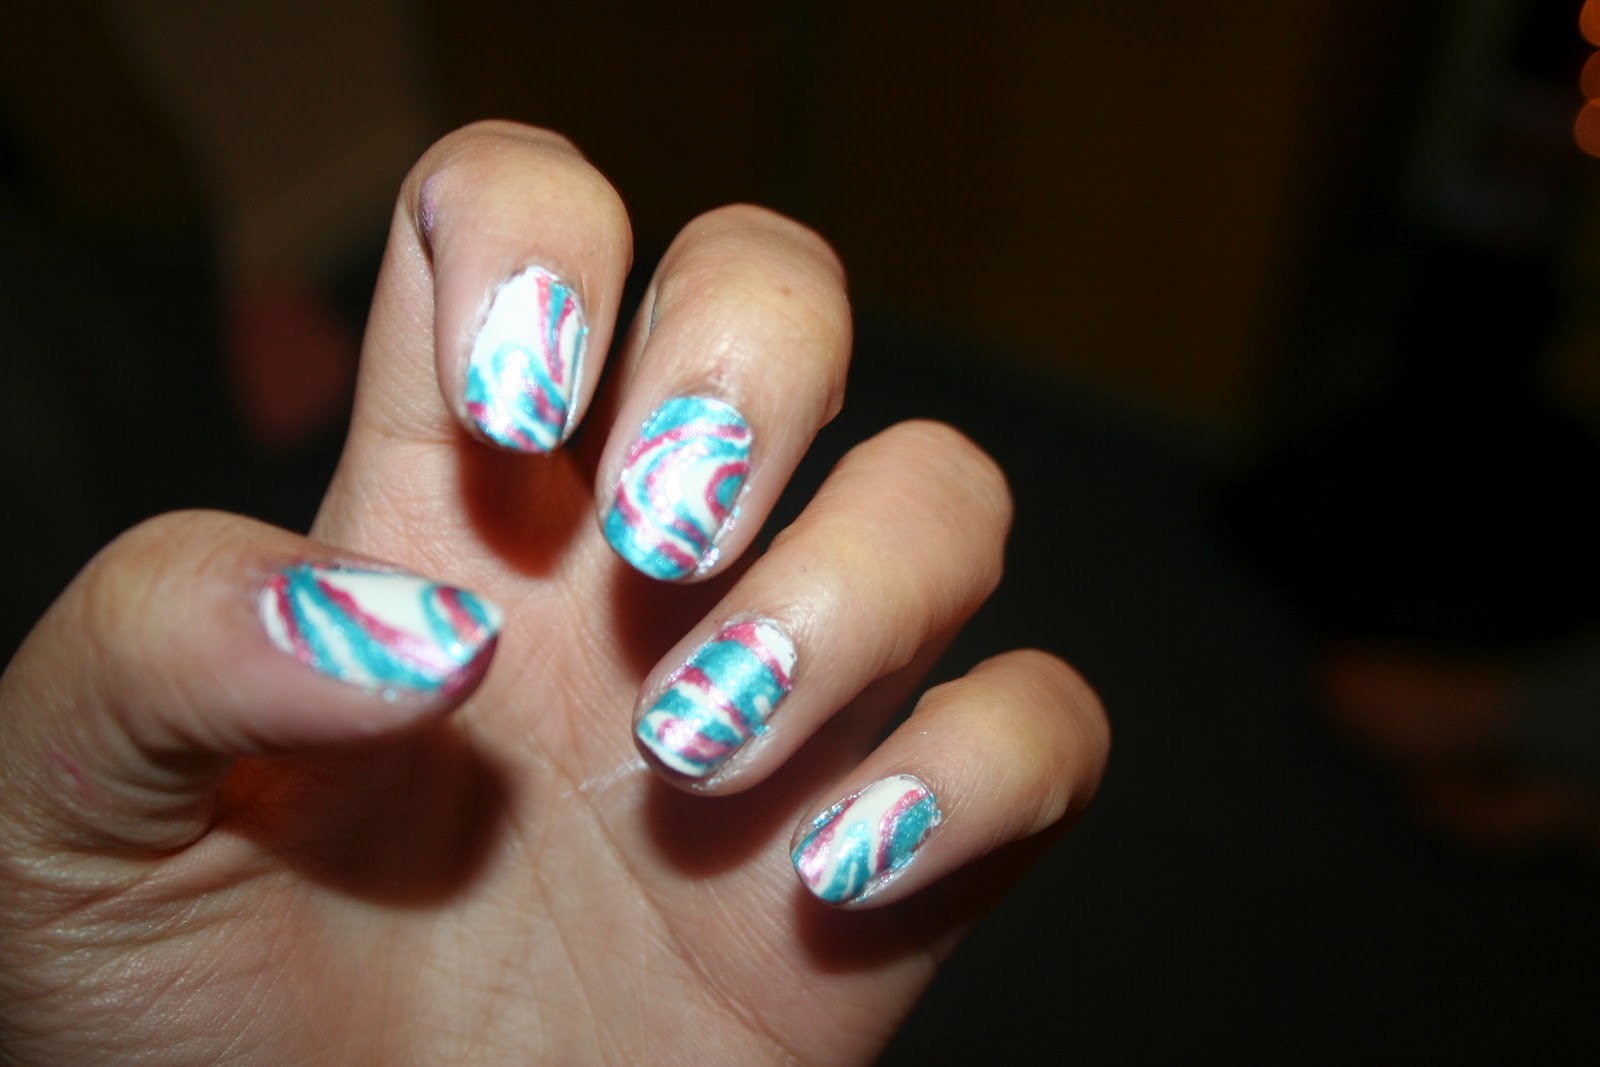
Day 19 - Water Marble
OK, if we're perfectly honest, this isn't real water marbling. We tried and tried so very, VERY hard but we just couldn't make it work! So here we've painted a water marble effect design on, though this didn't soften the bitter sting of failure. Ha. A tutorial for this one:

Cutepolish Water Marbling Tutorial


What do you guys think? 


HanDee

xx

Friday, 16 March 2012

31 Day Nail Art Challenge


So, being not-so-productive in the student lives we lead, we have decided instead to focus on something truly important... experimenting with as many different nail art styles and colours as possible! And what better way to properly break in the nail art pens than to take on the mammoth challenge of 31 different nail art styles in 31 days? 

Here's the list!

Day 1 - Red
Day 2 - Orange
Day 3 - Yellow
Day 4 - Green
Day 5 - Blue
Day 6 - Purple
Day 7 - Rainbow
Day 8 - Black and White

Day 9 - Metallic
Day 10 - Gradient
Day 11 - Polka Dots
Day 12 - Stripes
Day 13 - Animal Print
Day 14 - Floral Print
Day 15 - Tribal Print
Day 16 - Glitter
Day 17 - Half Moons
Day 18 - Galaxies
Day 19 - Water Marbled

Day 20 - Inspired by a colour
Day 21 - Inspired by a food
Day 22 - Inspired by a song
Day 23 - Inspired by a film
Day 24 - Inspired by a book
Day 25 - Inspired by fashion
Day 26 - Inspired by a pattern
Day 27 - Inspired by artwork
Day 28 - Inspired by a flag
Day 29 - Inspired by the supernatural
Day 30 - Inspired by a tutorial

And finally, Day 31 - re-create your favourite challenge!


To start off with, here are the first 8 days. Apologies for the quality of the first 6 photos!


Day 1 - Red
Simple, and a good way to ease yourself into the challenge - it only gets tougher from here!
All you need is a white nail varnish and a red nail art pen, and the rest is self-explanatory!

Day 2 - Orange
Deciding to take it up a notch now with tiger print!
You need: white nail varnish, orange nail varnish, a black nail art pen and a small piece of sponge.
Easy peasy really! Paint a white base coat, then, using the sponge, dab orange varnish over most of your nail, then finish with black stripes coming from either side! Easy Tiger!

Day 3 - Yellow
BANANARAMA! Though they may not look like it, these are in fact bananas on a blue background.
For this one you'll need a contrasting base coat, a black nail art pen, and if you're feeling particularly arty, TWO different shades of yellow nail art pens.
After you have your base coat down and dry, paint semicircles of the darker yellow. The next step is the paler yellow, to highlight. Then finally, there's the banana outline and hey presto, you're done!

Day 4 - Green
Feeling a manicure with a colour twist here...
Two different shades of green, simples. 

Day 5 - Blue
It was a particularly sunny day, so decided to match the weather!
Paint yourself a blue sky base coat, and then add white fluffy clouds with a white nail art pen! And if you're feeling particularly sunny, add yourself  some small rays of sunshine on the thumb!

Day 6 - Purple
You need a fairly steady hand for this one!
We used three different shades of purple, one for the base coat and 2  for the square outlines.

Day 7 - Rainbow
This is a personal favourite, being so bright and cheerful!
Red and yellow and pink and green... Well, you get the idea. Take care not to paint the early stripes too large or else there won't be enough room for poor purple on the end...

Day 8 - Black and White
There's nothing cuter or girlier than bows, so I decided to use this design to finish off the colour phase of the Challenge!
These are crazy easy, after the base coat is on, paint a small circle in the top corner of your nails. Follow this with 2 bow-looking blobs either side. Voila!


Stay tuned for the next batch!


HanDee

xx