Showing posts with label multi-colour. Show all posts

Monday, 9 July 2012

A Tessellating Design!

Hi guys! Here are some Tetris nails that I hope brighten up your Monday!


This design is really simple and doesn't take that long to do as the nail varnish dries very quickly! I decided to go with the standard Tetris colours, looked up the shapes and then went crazy with the order! Just start at the top of your nail and work towards the base slotting in the shapes as if you were playing Tetris! Make sure you paint on the individual squares of each shape so they look like real Tetris pieces. Then finish off with a cover coat of course! 

What do you think? What's everyone wearing on their nails at the moment?


Sunday, 3 June 2012

31 Day Nail Art Challenge - Day 31

IT'S FINALLY HERE! The end of the 31 Day Nail Art Challenge! It's been a long, hard road with many a discarded nail-varnish remover bottle paving the way but here's Day 31 - the repeat of your favourite design.


Now after doing this challenge I became a HUGE fan of animal print nail art, so decided to go back to Day 13. The nail art also follows the gradient design of Day 10. Now I've stressed how much colour means here at HanDee so decided to spice things up for this repeat and based the design on my funky shoes!
Here's the design I came up with! Very easy and a lot of fun to look at!

1) Choose about 7 different colours for your rainbow effect
2) Use small pieces of sponge (any will do!) and dab a layer of pink at the base of your nail
3) Repeat this with your other colours (red, orange, yellow, green, blue and purple)! Making sure the previous layers are dry before doing any more!
4) Once all these are dry, paint on black zebra/tiger stripes
5) Finish off with a topcoat!

So here it is, the end of the challenge. I definitely recommend any budding nail art-ists do this as it gives you LOADS of practice at so many different designs you may not have considered doing before! It's been loads of fun!


HanDee

xx

Saturday, 19 May 2012

31 Day Nail Art Challenge - Day 28

So Day 28 is Inspired by a Flag. Rather than be repetitive I decided to do 10 different flags of the top 10 countries I'd like to visit!


All these nails are easy as pie really, just simple backgrounds and a steady hand for some detail!


Left Hand:

Thumb: Guyana
1) Dark green background
2) Paint on a yellow isosceles (haven't said that since GCSE!) triangle
3) Paint a smaller red triangle at the base of your nail inside the yellow
4) Add a white outline to the yellow triangle, and a black one to the red triangle... and done! Nice, bright and easy!

Index Finger: China
1) Paint on a red background
2) Using a yellow, paint a large star at the bottom left of your nail, then four smaller stars around it - I only painted dots for the smaller stars as the brush was a little too big!


Middle Finger: Egypt
1) Paint on a white background
2) Paint a black strip at the bottom of the flag
3) Now paint a red one at the top
4) Now the Eagle (of Saladin) was very tricky! On my nail it just sort of looks like a golden blob, but you get the gist!

Ring Finger: New Zealand
1) Use a blue for the flag background
2) Paint on some red stars to the right of the flag (again mine just look like blobs I'm afraid!)
3) Paint a mini Union Jack flag in the top left-hand side of the flag: paint a small red cross first, then use a white for the diagonal stripes on the flag

Pinky: Italy
1) Paint on a white background
2) Paint a green stripe at the bottom of your nail
3) Finally paint on a red stripe at the top!

Right Hand: 

Thumb: USA
1) Paint a white background
2) Paint a blue square at the top right-hand corner of your nail
3) Add some small white stars (dots!) on the blue 
4) Finish off with the stripes!

Index Finger: India
1) Paint on your white background (yet again!)
2) Paint on an orange stripe at the top of your flag
3) Paint a parallel green stripe at the bottom
4) Add the Ashok Chakra (24-spoke wheel) in the middle in blue - I tried so very hard to try to make the wheel work but it became a blob again!

Middle Finger: Brazil
1) Paint on your green background
2) Paint on a yellow diamond shape
3) Add a blue filled-in circle in the middle of the diamond
4) Finish off with a white band diagonally over the blue

Ring Finger: Greece
1) Another white background!
2) Paint on a blue small square on the top left of the flag
3) Paint on some blue stripes
4) Finish off with the white cross on the blue square

Pinky: Japan
1) Ok, so last nail and last white base coat!
2) Then add your red dot in the middle! Easiest flag ever!


Apologies for the lengthy post!!

HanDee

xx


Saturday, 12 May 2012

31 Day Nail Art Challenge - Day 27

Ok, so next is Day 27 - Inspired by an artwork!


Now an absolute fave of mine is Van Gogh's Starry Night, but as I've already featured that on my nails (stay tuned for a post on it!) I wanted to go for something different today!


I chose one of Wassily Kandinsky's Colour Studies from 1927 for this day, mainly for the colour factor - as you all know, we love a good splash of colour at HanDee!


Very, VERY easy to do guys! A more time consuming than some designs, but only because here I decided to do one nail at a time to make sure nothing went wrong. You'll need about 8 different colours for your design here, any you like and then go mad! 

I found starting at the centre the easiest, painting small triangles then work outwards using different colours. Try not to have the same colours touching!


Not bad eh? And very fun to look at!


HanDee

xx


Monday, 7 May 2012

31 Day Nail Art Challenge - Day 26


Time for  Day 26 - Inspired by a Pattern!

I wasn't too sure what to do for this, but fancied something multi-coloured, as it just brightens everything up don't you think? Here's what I settled on:


Now our version is a little different, mainly because I didn't space the crosses out, but still looks quite groovy we think!


So, all you need to do is...
1) Paint on a background - a neutral one is best
2) Starting at the base of your nail, paint on a few red crosses
3) Carry on painting crosses of the other colours, trying to space them out evenly, and slotting them together like a puzzle really
4) Apply your top coat


Only a few days left of the challenge!!!


HanDee 

xx


Thursday, 29 March 2012

31 Day Nail Art Challenge continued...


OK guys, here's the next batch of the 31 Day Nail Art Challenge! Getting slightly trickier now, but you mustn't give up, the results (and compliments!) are well worth it!

Day 9 - Metallic
Though fairly difficult to tell, I aimed to do a sort of tartan pattern here using a metallic blue, pink and silver. It sort of turned into a mass of blobs, but still looks quite striking we think!
What you'll need: a metallic base coat, and then two metallic nail art pens. After the base coat has dried, paint on crosses with one of your nail art pens. Then (and this is where we went wrong!) once it is BONE DRY, take the other pen and draw crosses over the top of these, making these crosses slightly thinner. Tartan-tastic!

Day 10 - Gradient
Ridiculously easy to do and just gives your nails that extra something! Here we used a dark purple, purple glitter and then silver glitter nail varnishes.
For this effect you will need a sponge and then lightly dab each colour on, waiting for the nail varnish to dry in between.


Day 11 - Polka Dot
This design is so much fun and really bright, perfect for the lovely weather Spring brings!
After painting your base coat, grab a few nail art pens in different colours and go wild! Here especially like the over-lapping of the dots, giving it that little somethin' somethin'.

Day 12 - Stripes
We went for a simplified manicure here, which has quite a classy look. But give it a go with clashing colours or more stripes! Go mad!

Day 13 - Animal Print
We LOVE LOVE LOVE a bit of leopard print, so it was obvious what animal we wanted on our nails! But just to spice things up, we went for a crazy colour combo.
To achieve leopard print: paint on your base coat. Then after it's dry, using one of your chosen colours paint small circular blobs on your nails. Then finally, using your other colour (we recommend a darker one to the blobs) draw semi-circles around the dots and add a few small dots next to these!

Day 14 - Floral Print
There's nothing better in life than stopping to smell the roses, and with this design you can have these beautiful flowers at hand any time (get it?) Perfect for the sunny seasons!
You will need: a background colour of your choice, a dark green nail pen, a white nail art pen and then two shades of the same colour for your roses.

1) Begin (after your base coat has been applied) by painting relatively large circular blobs on your nails with the darker shade of the colour you have chosen for your rose

2) Now using the lighter rose colour, draw some small semi-circles (3 worked for us) onto your rose
3) Using the white pen, do the same and paint semi-circles on the outer edges with a cheeky one in the centre to shape the petals
4) With your dark green, add the leaves to the roses ... and there you have it!

Day 15 - Tribal Print
This design was so fun to paint on and looks really original and exciting! 
It's pretty much up to you how you want to paint on your tribal print, we chose three very different colours: purple, red and cream as the base. All you need to do is paint on a few stripes (vertical or horizontal!) anywhere you fancy on your nails, then use a black nail art pen to add the tribal detail. Pretty nifty eh?

Day 16 - Glitter
As you may have guessed, it was St. Patrick's Day when this day came around, so we wanted to incorporate the Emerald Isle into the design!
What you'll need: three different shades of green nail varnish and a glitter polish.
How to do it: start by painting a stripe of green over the top of your nail; once dry, paint small light green crosses on your nail; once these are completely dry, use your darker green polish to draw an outline of the clovers and the stalks!

Day 17 - Half Moons
This design has always seemed quite plain and, well boring, but after trying it out we loved it! Very simple (and easy!) but very effective for a more interesting mani!
All you need is a couple of contrasting colours, and you're good to go! Start by applying the base coat, then once dry use your second colour to paint a semi-circle at the base of your nail and it's that simple! We added an extra line to break the colours up even more.

Day 18 - Galaxy Nails
Now this one is a bit tricky... But is well worth all the effort! An AMAZING tutorial for this can be found by cutepolish at:

Cutepolish Galaxy Nails Tutorial

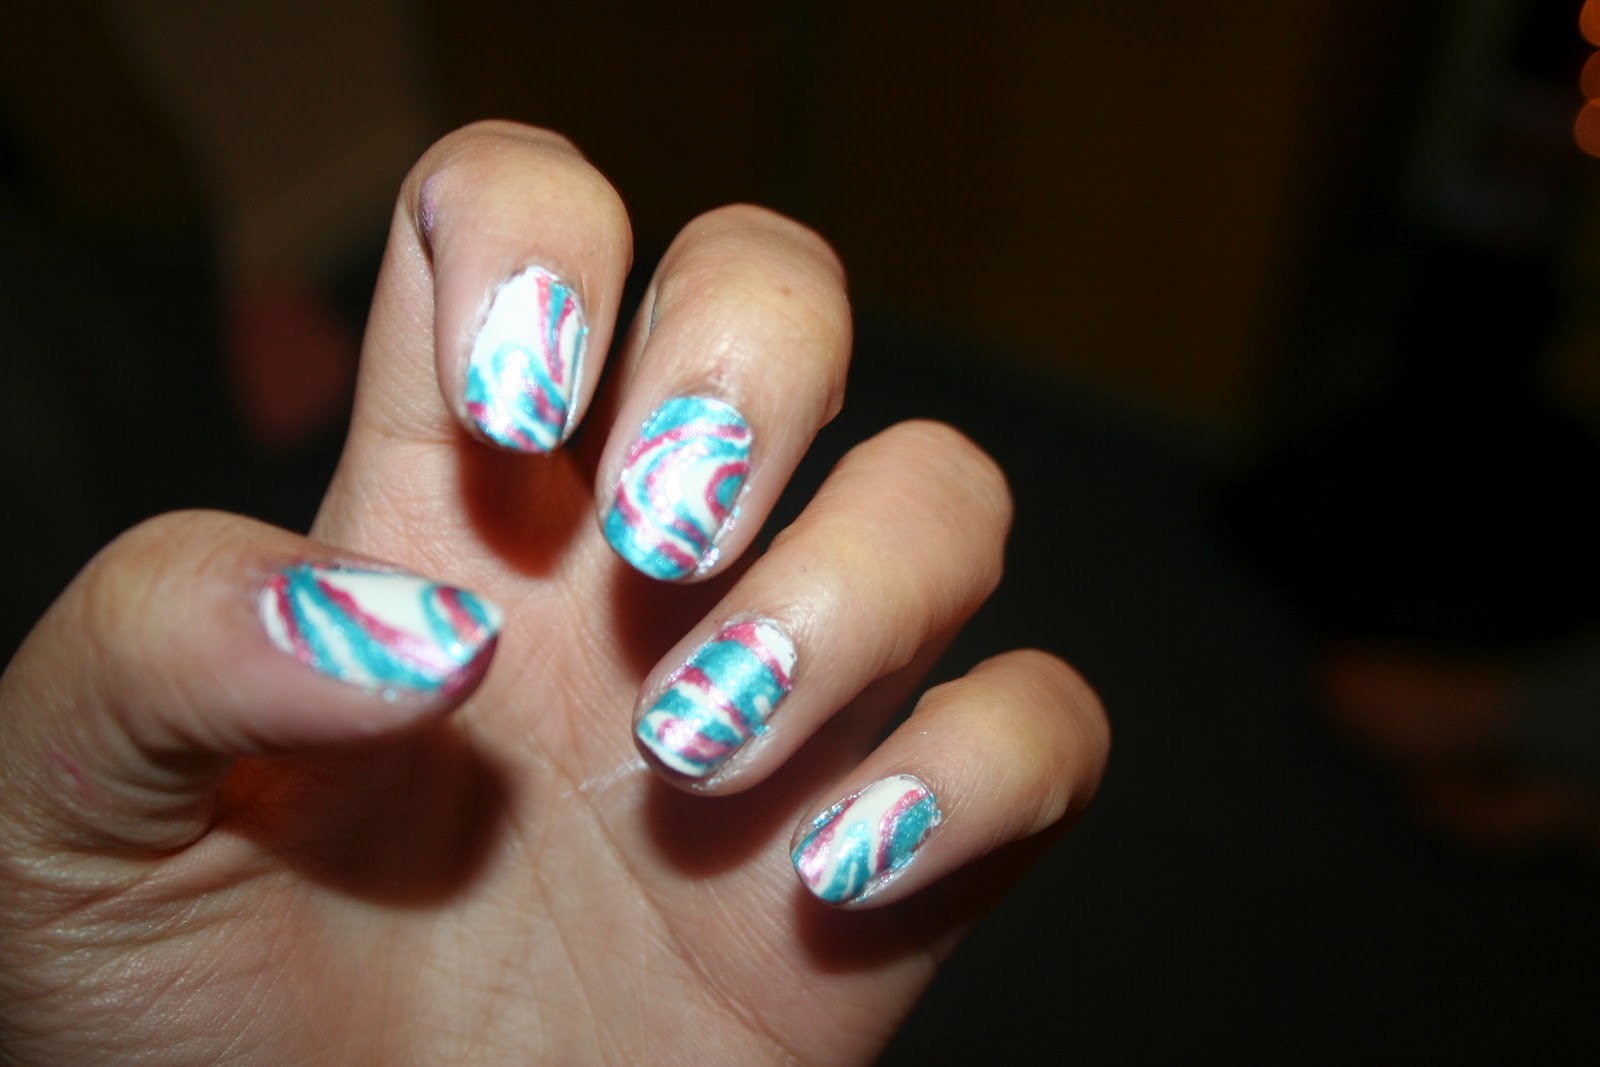
Day 19 - Water Marble
OK, if we're perfectly honest, this isn't real water marbling. We tried and tried so very, VERY hard but we just couldn't make it work! So here we've painted a water marble effect design on, though this didn't soften the bitter sting of failure. Ha. A tutorial for this one:

Cutepolish Water Marbling Tutorial


What do you guys think? 


HanDee

xx